After much research and talking to people I realized I do not want to pay about $1000.00 for an improved kick-up model and I also do not want to pay $300.00 to $400.00 for a used one built the same as the one I broke nor a new equivalent replacement for about $600.00
 Here's a picture of the broken one.
As you can see it has some plywood core and then most of it is some kind of filler; which is kind of heavy by the way.
Problem #1: Notice how the bolt closer to the edge goes through filler, not plywood. I think this is a flaw which I intend to correct on my design.
Problem #2: The place where the bolts go through have no sealer of any kind and allow water to penetrate to the core and make it prone to deterioration; by the way, as per my research and judging by the way this particular rudder broke, that is the weakest point on a rudder of this kind; therefore I intend to change that to make the two bolts go through plywood and also to remove the core around the hole and fill it with epoxy. I also plan on other changes that I will show later.
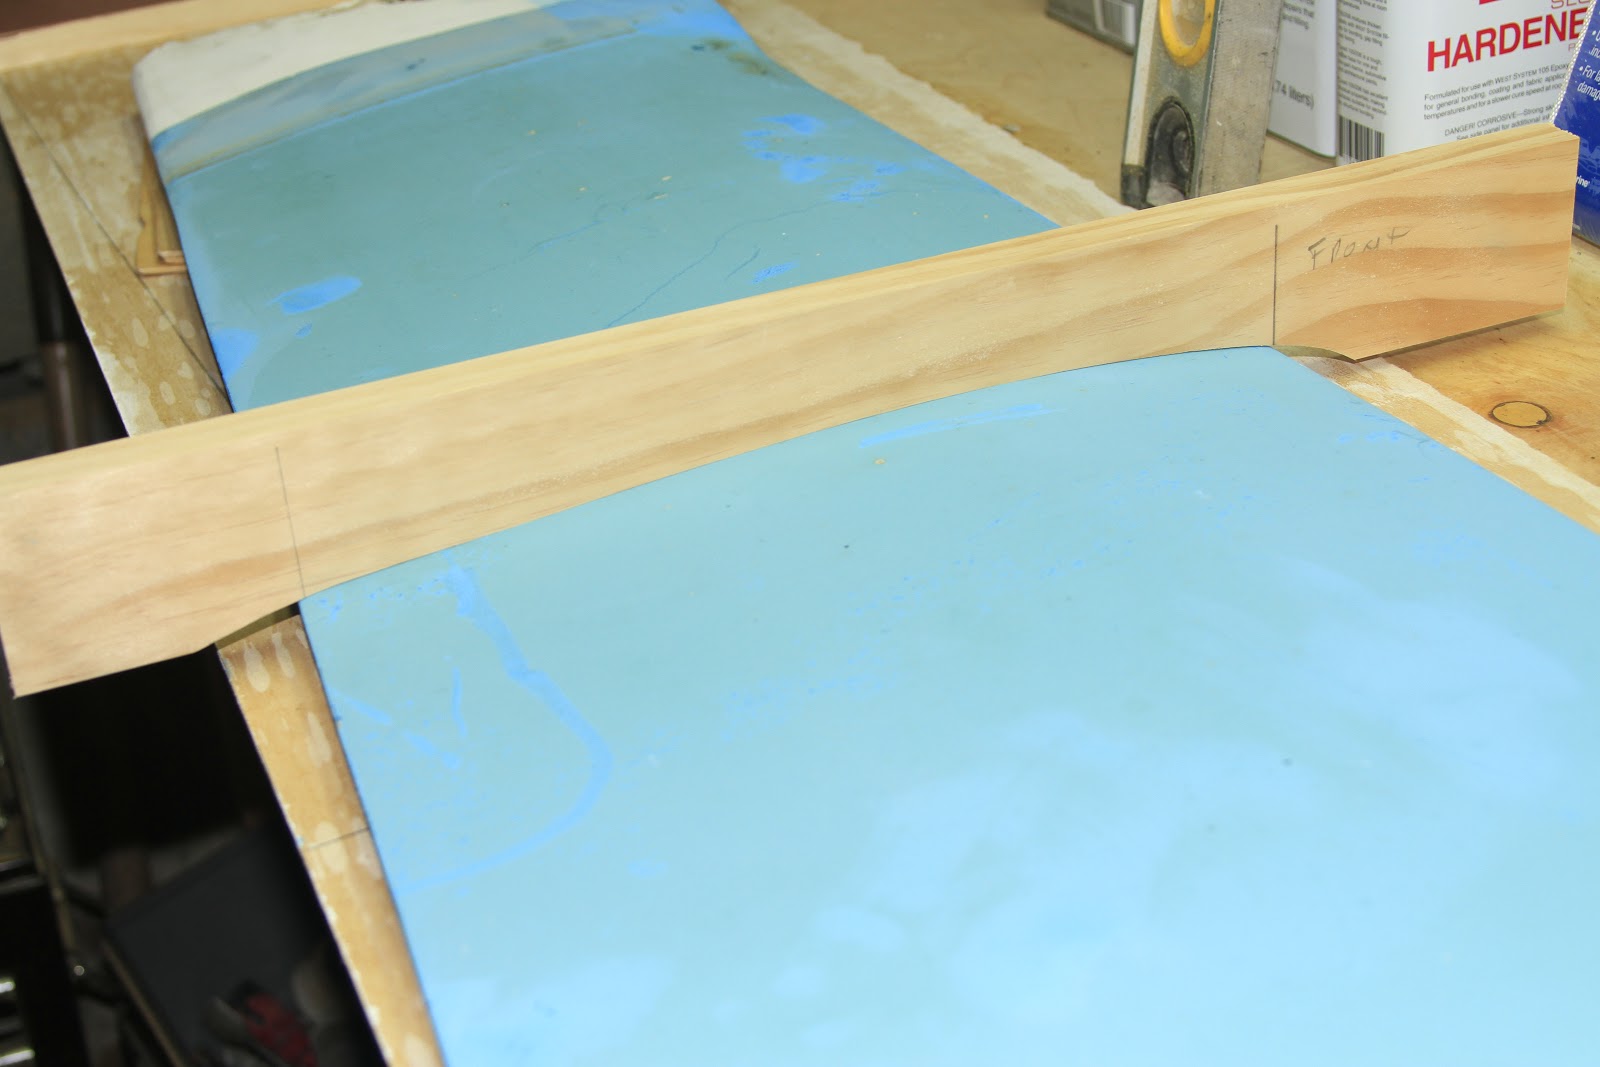
 OK, to begin with, I started by making a template of the existing rudder (it was at this point when I realized it was not only a good idea to recover it, but it was also necessary).
My research on rudders seem to suggest that if the rudder extends forward of the pivoting axle it would be more balanced, making steering easier and more relaxed, specially on those moments where you have a lot of weather helm; so I decided to extend the rudder about one inch forward under the water line. I'm being conservative here as I do not want to end up with something that does not work, if the change has negative effects on steering and/or performance I expect it to be not that bad as to not having to build another one. I will just have to deal with it. If it proves beneficial, great...
Also notice at the top I extended it past the horizontal line (as the original) as I found that I mostly steer with the tiller slightly elevated, this change makes the hardware that holds the tiller to the rudder grab on solid rudder opposed to applying leverage on the hardware alone.
I proceeded to cut the main or center piece out of 1/2" marine plywood, then I added one more section of 1/2" marine plywood on each side but just over the water line. Used epoxy to glue the whole sandwich together.


Now, the hardest part (at least for me) is to shape the underwater section of the rudder with the foil shape and the chalenge of getting both sides the same as to not get any lift or pull from one side.
I thought about how to achieve this and after much consideration I came up with a plan.
I will copy the original shape of the rudder. Easier said than done considering that I made mine larger than the original. I decided that I would leave a portion flat which will account for the forward extension I added to my design. I cut a strip of 1/2" plywood, shaped it accordingly and tapered the edges, this will give me the highest point of the foil. Then, with filler epoxy I will contour the final shape of the foil.
Fist I traced the original rudder shape into what will end up being the shaping tool.
Since the one I'm building is wider I needed to split the "shaper".

Then I epoxied the center piece of plywood and applied the first coat of filler, this first coat is just to build up the shape so the shaping coat can be thinner and easier to work with.

The next step after that was to measure and secure a straight edge on which to run the shaping tool. I screwed a section of 1x3 to the center plywood piece, did one side, re-screwed the straight edge on the right position for the opposite edge side and did the same. The bottom part was shaped by hand. It would have been better to run front and back side, let dry and then do the bottom part but, with the drying time and mixture waste I decided to go for it, I still need to do a light sanding and a final skim coat anyways.
So far, this is what it looks like, I'm very pleased with they way it's coming out.


I will try to finish shaping both sides this weekend and next week I will wrap the whole thing in fiberglass mat, applying an additional layer on the mid section.
Originally I was planing on doing three layers of cloth but it's not necessary, I will do only one plus some reinforcement along the water line (the weakest part of the rudder).
Hi Guillermo!
ReplyDeleteThanks for documenting your new rudder and also for posting the picture of the inside of your broken rudder! My new to me 1974 Catalina 22 has a kickup rudder, but I found a blade style rudder on a boat that was about to be demolished. I have nted a crack in the rudder in way of the lower pintle and drilled some holes and found a moist core that appears to be wood. I will grind down the cracks and then reglas and epoxy to build it back up. I was curious what is the core material for the lower part of the rudder. Any ideas? I drilled into the lower rudder and did not find any wood.
Thanks again and good luck!
CJ
Covington, LA
s/k 3198
Hi CJ, thanks for looking !!
DeleteAs you can guess the weakest part of the rudder is where you found the crack on yours and where mine broke. After seeing how the original rudder was build, I don't know I want to spend the time and effort to rebuild/fix the one with the crack and probably deteriorated plywood core. The reason you are not finding any wood on the lower part is because there's very little plywood on the blade portion of the rudder, most of it is some kind of filler, not sure what it is, it's white, very brittle and heavier than epoxy, the rudder is wrapped with, what appears to be, just one layer of Chopped Strand Mat glass which is not the best choice for the task. Actually woven mat is stronger due to the length of the fibers and, if you add a second layer in diagonal it will be much stronger than two, even three layers of the chopped strand mat.
As for as re-glassing, I think it will add some good strength to it, but, if the core is gone, you will be only relying on the shell to give you all the strength you need. I'm not an engineer but I don't think it will last long. That's why I built mine with a good plywood core (1/2") plus one more strip on each side and two layers of woven glass mat on the outside. I do not want the rudder to break again.
Hope this helps. Let me know if you have any questions and please stay tuned for the completion of my project, almost done....
Willy.
Hi Willy!
ReplyDeleteGreat job!
I also have a catalina 22 and got my rudder chewed up by my outboard prop.
There is a chunk missing aproximately 8 inches radius.
Was considering epoxying a series of 1/8 " diameter wires to the solid parts of the rudder and projecting into/across the void to form a backbone onto which I could lay the glass mat and then finish with west system plus UV resistant paint......any thoughts?
Jim D.
Hi Jim, thanks for looking !!!
ReplyDeleteYour idea sounds good, that's basically how they build rudders for bigger boats so, if it works in a larger scale it should in your repair as well. Just make sure everything is water tight to prevent rust on the wires.
Another thing you can do is taper down the edges around the missing "chunk", fill the void with foam and glass at least two layers of woven mat on top of the foam and into the tapered edge. That should also give you a strong repair.
Whichever way you go, I hope it turns out good and you can be back sailing soon !!!
Good Luck and please come back to report on your experience.
Willy.
Thanks for your fast answer
ReplyDeleteI will need to taper down the edges either way, just was not sure how to hold foam/ glass mat in place while applying the epoxy. I guess you work on one side first and place some kind of backing material until the fix sets in and then it would be easier to do the other side. Did you use West System fillers?
I will attempt repairing it next January. Will take pictures and post them
Again, thanks
Hi Jim !!
ReplyDeleteYes, I used West Systems, although it's a bit more expensive and I don't think is necessary for the repair I did. The reason I went with it is because there are plenty of other repairs I have to do in the coming weeks, such as, fixing a delaminating portion of the deck, on which I plan on using nothing but the West System; therefore I just bit the bullet and bought everything I need for the further repairs as well.
During my rudder repair process I did some testing with the 3M resin and hardener sold at big box stores and I can say it works fine for some minor rudder repairs. The price is about a third of the West System epoxy.
However, there are some considerations to have, I can honestly say, the West System is a lot easier to use due to the mixing ratios and the pumps which make it really a foul proof method, the other resin has mixing limitations depending on the amounts needed for the repairs, I will not go into details (you can find them online) but you get the idea.
Good luck with your repairs!!!!
Willy.